How to create AWS Lightsail Instance (with basic Settings)
Intro
AWS Lightsail은 EC2에 비해 저렴하게 가상 머신을 사용할 수 있다는 장점이 있다. Lightsail Instance를 생성 후 Timezone, Hostname 설정 등의 기본 설정을 진행한다.
Create AWS Lightsail Instance
AWS 가입 및 결제 수단 등록
Amazon 사이트에 접속 후 가입과 결제 수단을 등록한다.
Create Lightsail Instance
-
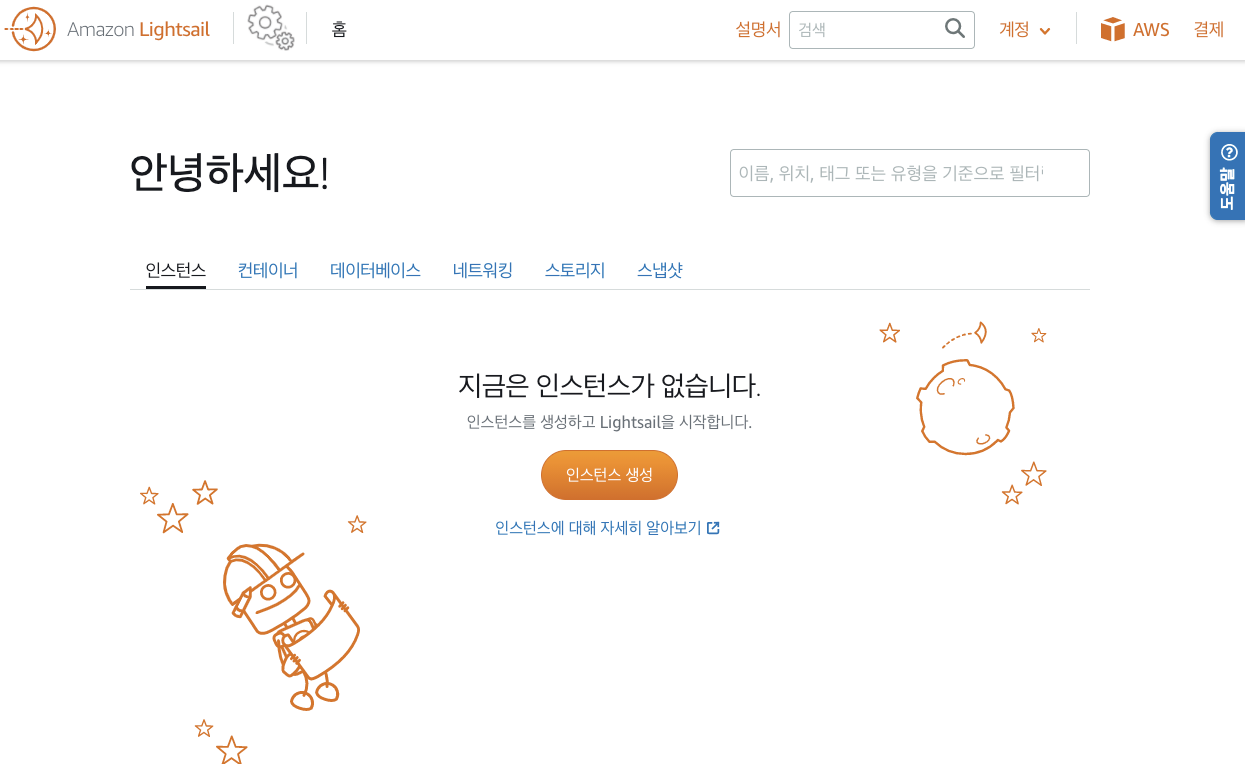
AWS에 Login 후 Lightsail Home 에서 인스턴스 생성 버튼을 눌러 생성 페이지로 이동한다.
-
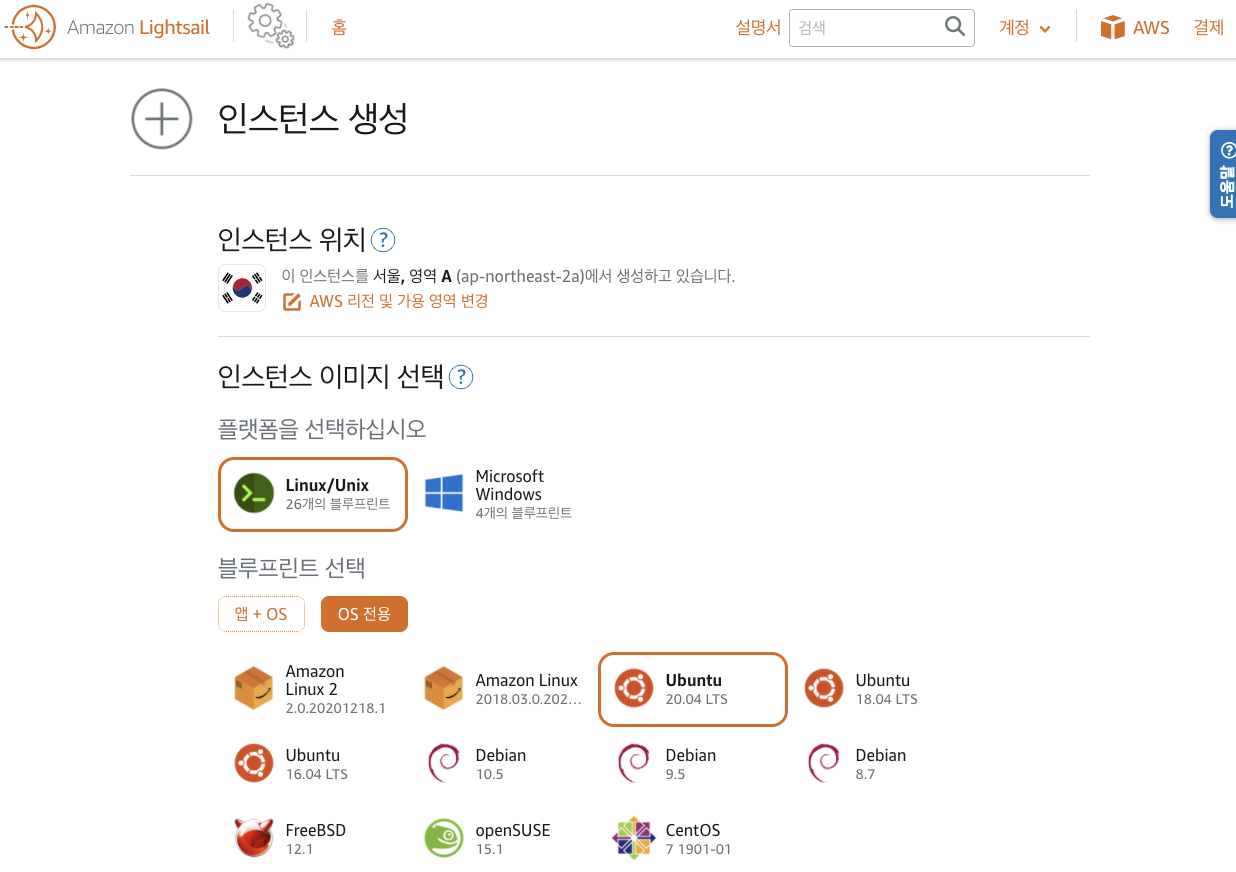
리전과 OS를 선택한다.
- Instance Plan을 선택한다.
- Kubernetes Cluster 구축 시 2CPU 이상과 2GB RAM 사용량을 권장하고 있다.
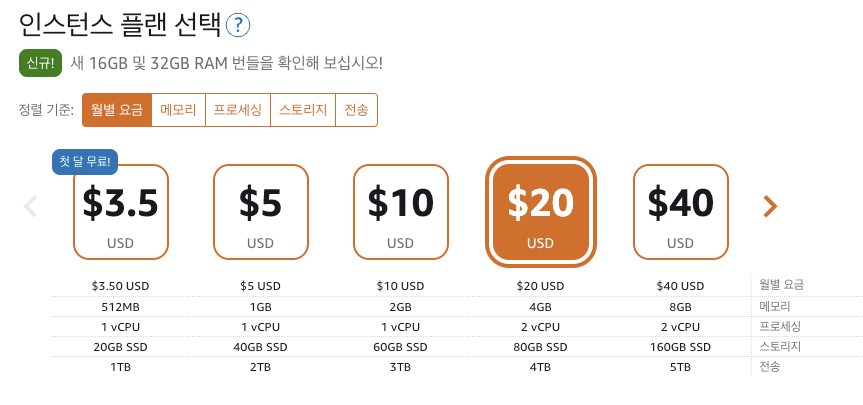
- Kubernetes Cluster 구축 시 2CPU 이상과 2GB RAM 사용량을 권장하고 있다.
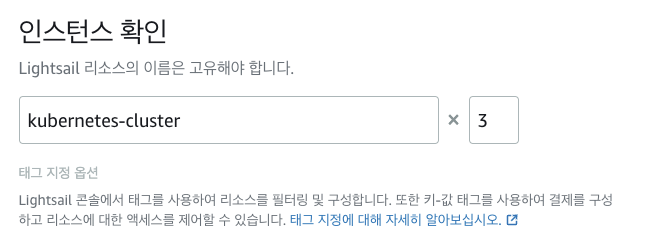
- Instance 리소스 이름과 생성할 Instance 개수를 입력한다. 한번에 여러개의 Instance를 생성 할 수 있다.
-
인스턴스 생성 버튼을 눌러 생성절차를 완료한다.
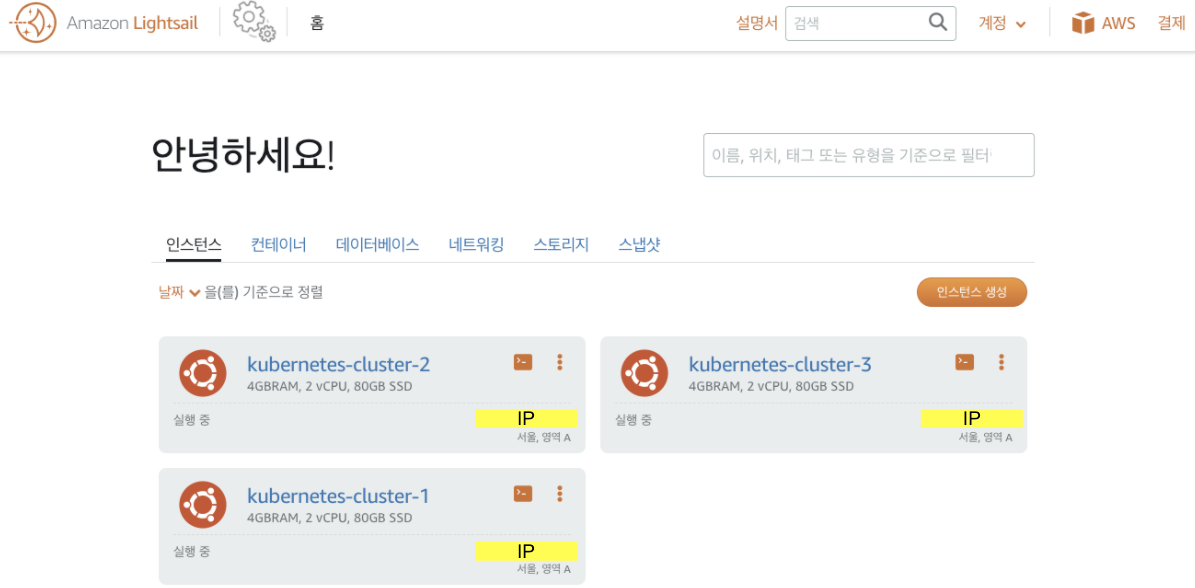
- Lightsail Home에서 생성된 Instance를 확인 할 수 있다.
Instance Basic Settings
각각의 Instance에는 Console 혹은 SSH로 접속하여 접근할 수 있다. Amazon Linux, Ubuntu의 기본 설정 방법을 정리한다.
Setting Fixed Public IP
- 고정 IP 설정
- Instance 이름을 누른 후, 네트워킹 탭에서 고정 IP 생성 버튼을 눌러 Public IP를 고정해 준다. 이후 Instance가 재시작되서 IP가 변경 되더라도, Public IP는 고정된다.
Lightsail Home-네트워킹 탭에서 고정 IP를 생성하고, 동시에 Insatnce에 붙일 수 있다.
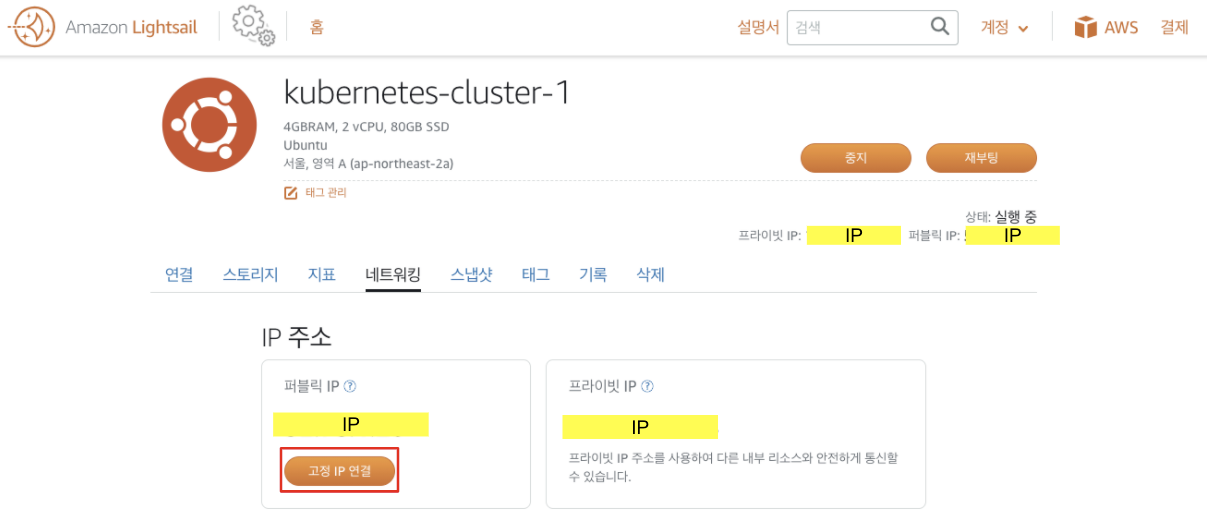
- Instance 이름을 누른 후, 네트워킹 탭에서 고정 IP 생성 버튼을 눌러 Public IP를 고정해 준다. 이후 Instance가 재시작되서 IP가 변경 되더라도, Public IP는 고정된다.
- 고정 IP 생성
- 고정 IP를 생성 후 Instance에 붙이거나, 동시에 Instance에 연결 시킬 수 있다.
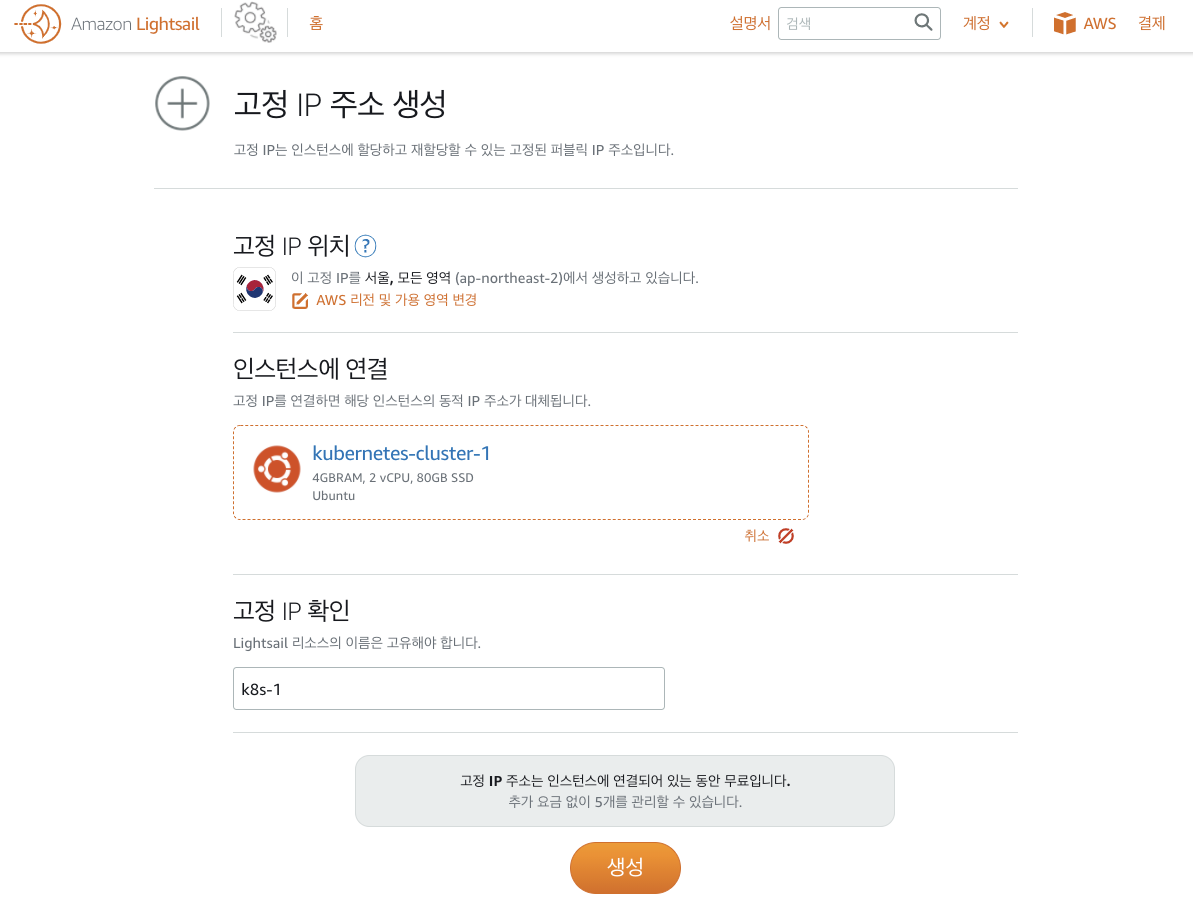
- 고정 IP를 생성 후 Instance에 붙이거나, 동시에 Instance에 연결 시킬 수 있다.
Timezone Setting
Instance에 설정된 기본 Timezone은 UTC이다. 필요에 따라 한국의 timezone으로 변경한다.
Instance 들에서 아래의 명령을 통해 기존의 Timezone을 제거 한 후, Asia/Seoul의 Timezone을 /etc/localtime에 링크해 준다. date 명령을 통해 KST로 바뀐 timezone을 확인 할 수 있다.
sudo rm /etc/localtime
sudo ln -s /usr/share/zoneinfo/Asia/Seoul /etc/localtime

# check Timezone
date
Change Hostname
Instance를 생성하면 IP를 기반으로 hostname이 설정되어 있다. hostname을 변경하여 명시적으로 instance를 사용한다.
- sysconfig 수정을 통한 방법
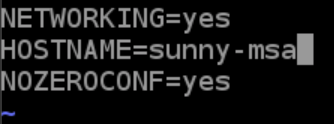
아래의 명령을 통해 /etc/sysconfig/network파일의 HOSTNAME 변수의 값을 수정하여 hostname을 변경한다. 재 부팅 후 인스턴스에 재 접속 시 바뀐 hostname을 확인 할 수 있다.
sudo vim /etc/sysconfig/network
- hostnamectl를 사용한 방법
아래의 명령을 사용해 hostname을 변경한다. Instance 재부팅을 하여 적용을 완료한다.
sudo hostnamectl set-hostname myhost

sudo reboot now
- /etc/hosts 파일 수정
/etc/hosts 파일에 “127.0.0.1 hostname”을 추가하여 변경된 hostname으로 호스트 주소를 찾을 수 있도록 설정할 수 있다.
sudo vim /etc/hosts

Java 8 설치 - Amazon Linux
amazon linux에 기본으로 설치 되어 있는 java 버전은 7이다. 8 또는 필요한 버전을 yum을 이용해 설치한다.
- java8을 설치
sudo yum install -y java-1.8.0-openjdk-devel.x86_64
- java 버전 변경
sudo /usr/sbin/alternatives --config java
- java 버전 확인
java -version
- 필요 없는 Java7 을 삭제
sudo yum remove java-1.7.0-openjdk
Java 8 설치 - Ubuntu
apt를 통해 Java (openjdk)를 설치할 수 있다.
sudo apt-get update
sudo apt-get install openjdk-8-jdk
java -version
Docker 설치
- amazon linux
아래의 명령어를 통해 docker를 설치할 수 있다.
// install docker
sudo yum install docker

// check docker version
docker version

// docker service start
sudo service docker start
- Ubuntu
apt 명령을 통해 docker를 설치 할 수 있다.
$ sudo apt-get update

$ sudo apt-get install \
    apt-transport-https \
    ca-certificates \
    curl \
    gnupg-agent \
    software-properties-common

$ curl -fsSL https://download.docker.com/linux/ubuntu/gpg | sudo apt-key add -

$ sudo add-apt-repository \
   "deb [arch=amd64] https://download.docker.com/linux/ubuntu \
   $(lsb_release -cs) \
   stable"

 $ sudo apt-get update
 $ sudo apt-get install docker-ce docker-ce-cli containerd.io
- 일반 계정 docker 사용 권한 설정
적용 후 다시 로그인 해 준다.
sudo usermod -a -G docker $USER // $USER : current user
Git 설치
- Amazon Linux에서 아래의 명령을 통해 git을 설치할 수 있다.
sudo yum -y install git
- Ubuntu에서 아래의 명령을 통해 git을 설치할 수 있다.
sudo apt-get install git
Source
- https://docs.docker.com/engine/install/linux-postinstall/
- https://docs.docker.com/engine/install/ubuntu/

Leave a comment