[Flutter] Flutter Android App의 Firebase 연동 & FCM Cloud Messaging Test
Flutter Android App을 Firebase와 연동는 과정을 정리해 본다.
- 사전 준비
- flutter app 생성
- Firebase 프로젝트 생성
Flutter App설정
Firebase Android App 추가
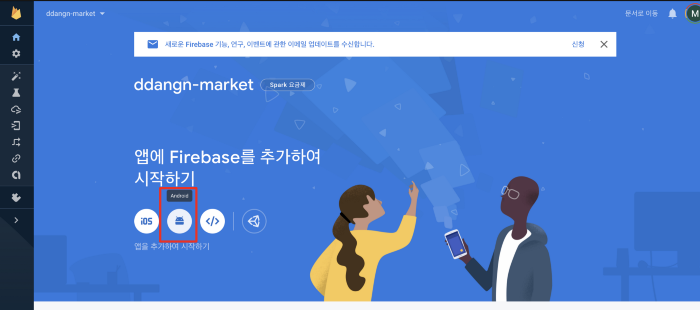
Firebase에 접속하여 Android App을 추가한다.
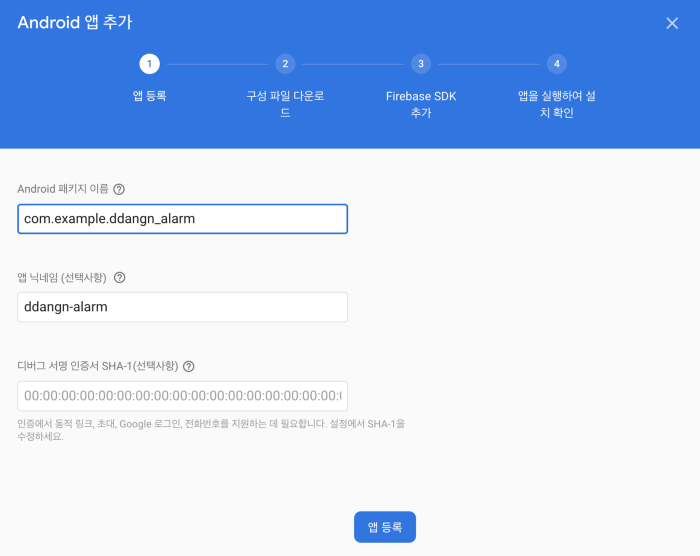
Android 패키지 이름을 설정
Android 패키지 이름과 Firebase의 Android 앱 추가 설정의 패키지 이름을 동일하게 설정한다.
- /android/app/build.gradle 파일의 android.defaultConfig.applicationId 값 수정
... android { ... defaultConfig { applicationId "com.example.ddangn_alarm" ... } } ... - Firebase의 Android 앱 추가 설정의 패키지 이름 설정
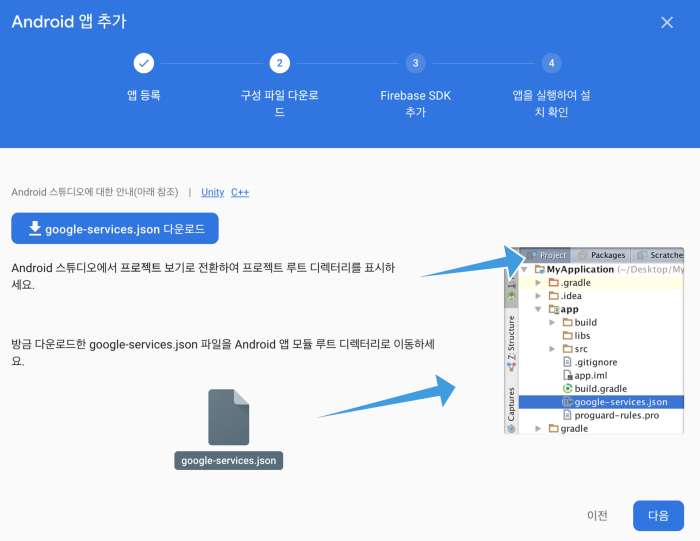
google-services.json 파일 복사
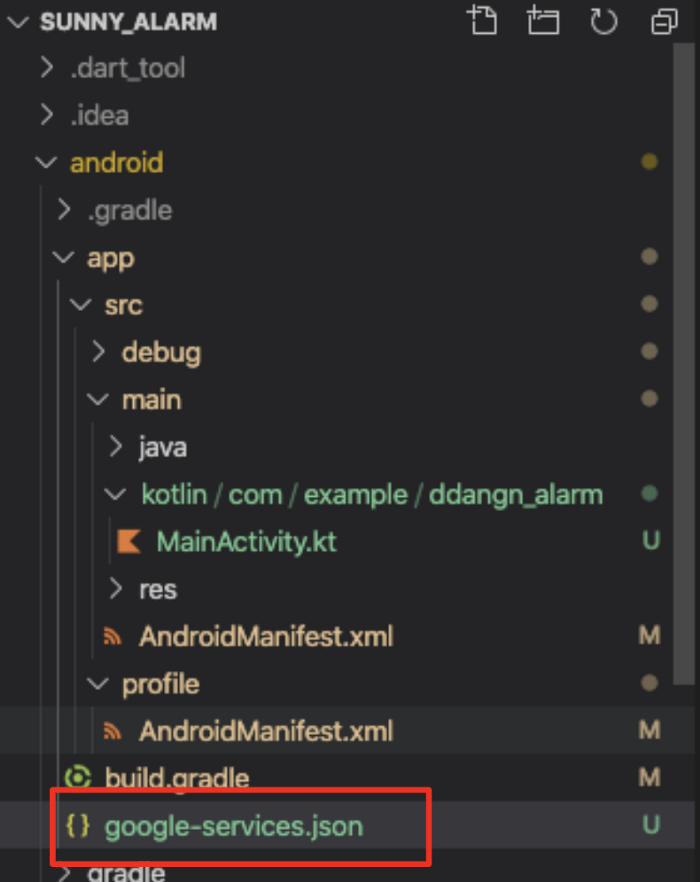
google-services.json 파일을 다운 받아 아래의 경로에 추가한다.
- /android/build.gradle 의 dependencies에 google-services(현재 3.2.1 버전 호환)를 추가
google service plugin 설정
/android/app/build.gradle에 plugin을적용해 준다.
- add dependency 가이드
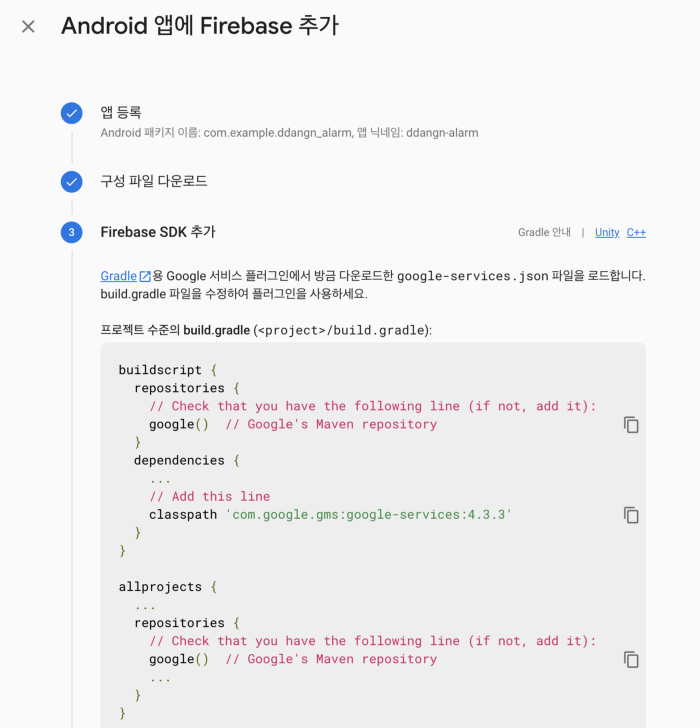
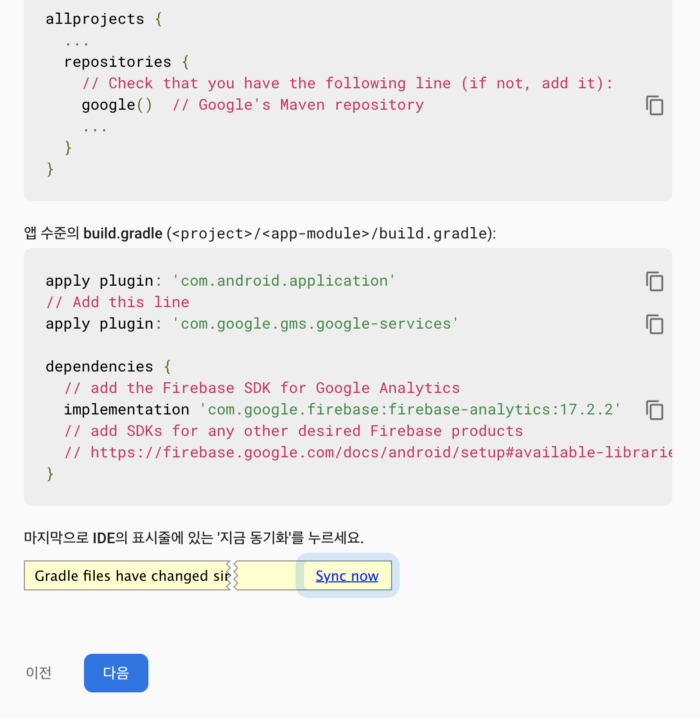
- build.gradle 예시
buildscript {

  repositories {
    // Check that you have the following line (if not, add it):
    google()  // Google's Maven repository
  }

  // ...
  dependencies {
    // ...

    // Add the following line:
    classpath 'com.google.gms:google-services:3.2.1'  // Google Services plugin
  }
}
allprojects {
  // ...

  repositories {
    // Check that you have following line (if not, add it):
    google()  // Google's Maven repository
    // ...
  }
}
- build.gradle apply plugin
dependencies {
  // ...
}

// ...

// Add the following line to the bottom of the file:
apply plugin: 'com.google.gms.google-services'  // Google Play services Gradle plugin
App 을 빌드 후 실행
App을 안드로이드 디바이스 (가상 디바이스 포함)에서 실행하여 설치를 확인한다.
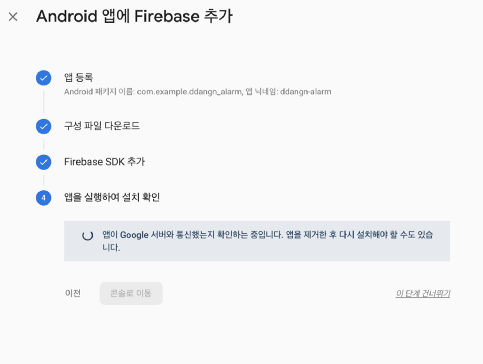
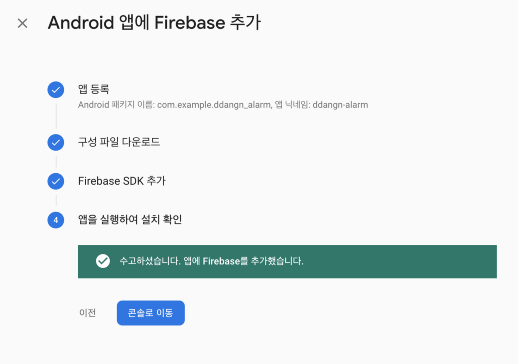
FCM Cloud Messaging Test
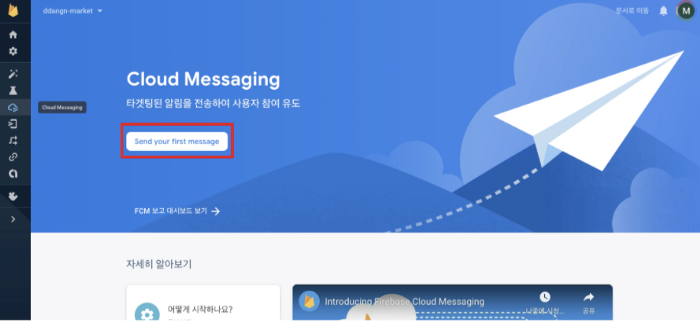
- Cloud Messaging에 접속 후 Send message 메뉴 이동한다.
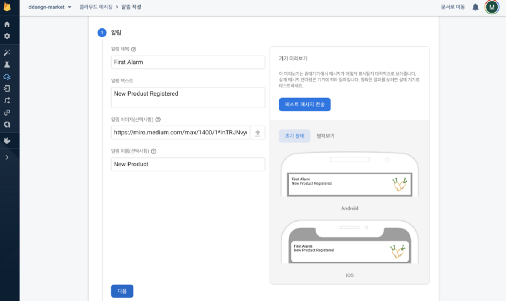
- 알림 내용을 입력 후, 타겟을 앞에서 등록한 App으로 선택한다.
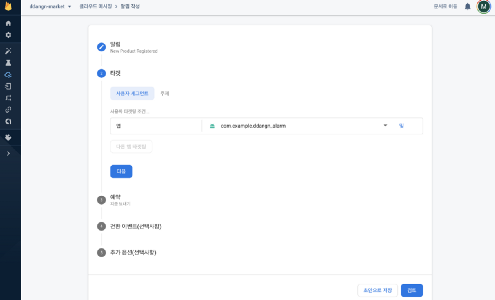
- 예약 시간 설정
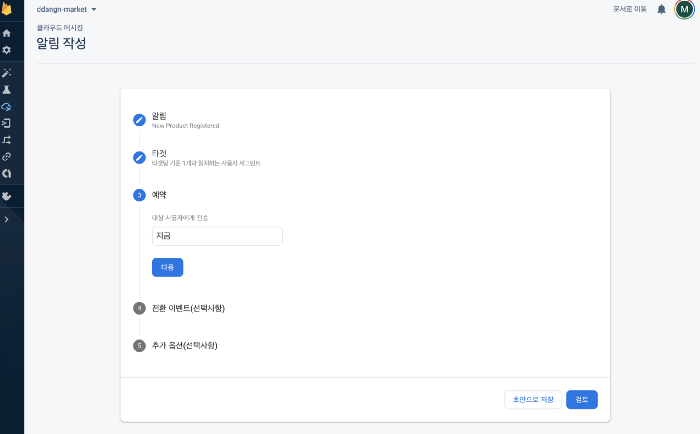
- 전환 이벤트 설정을 기본 값으로 설정
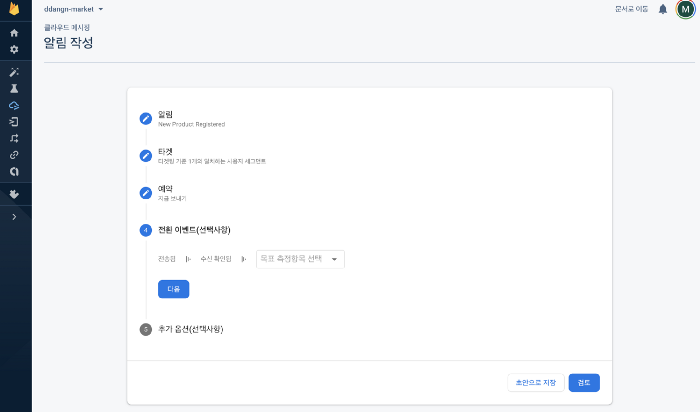
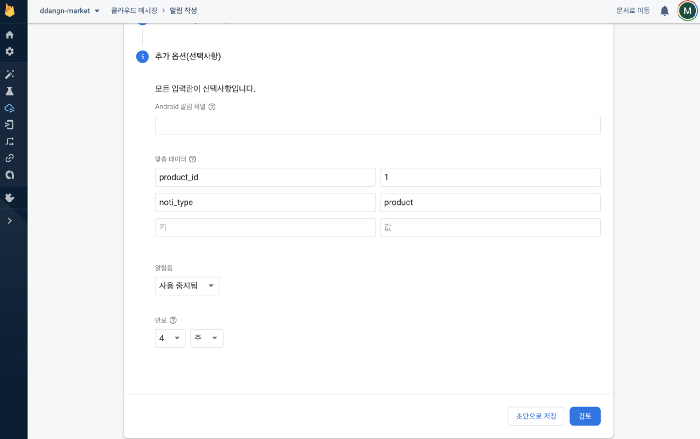
- 알림에 데이터를 추가가 가능하다.
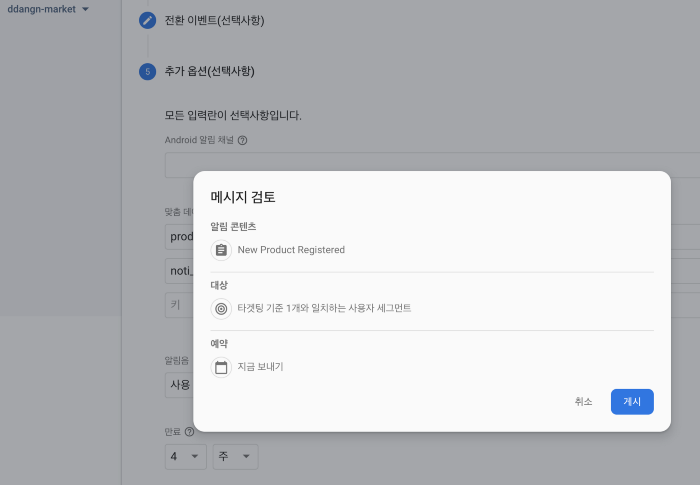
- 최종 검토 후, 게시 버튼을 눌러 메세지를 전송한다
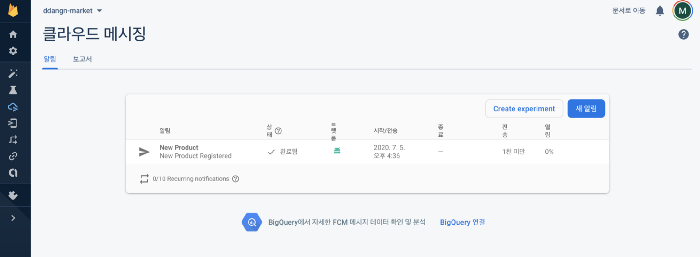
- 보낸 메세지 리스트에서 메세지 확인 가능
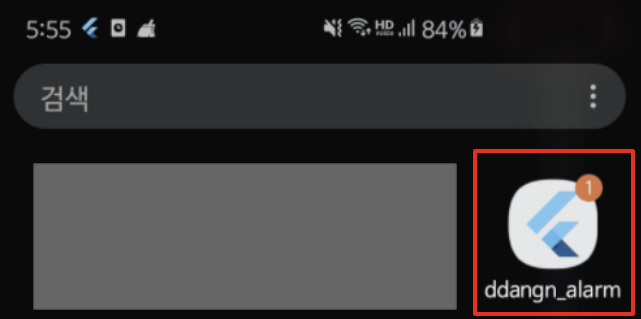
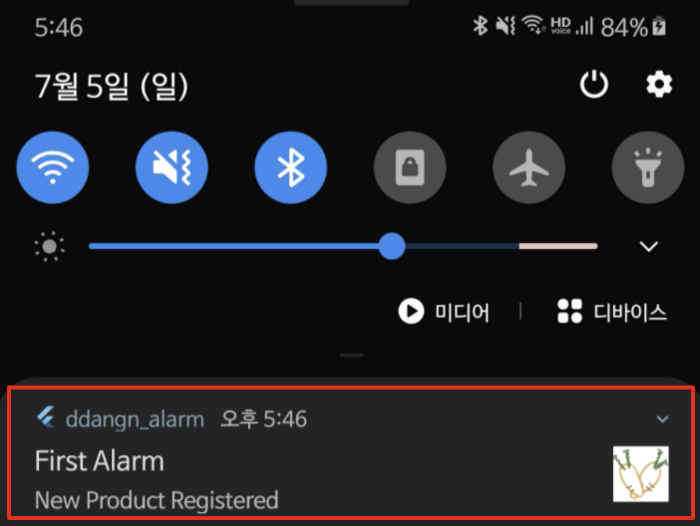
- 최종적으로 앱이 설치된 디바이스에서 알림을 확인한다.
앱 설치 후 앱이 실행 중인 상태에서는 알림이 수신은 되나, 쉬운 알림 확인을 위해 앱을 종료한 상태에서 대기 하여 디바이스의 진동, 알림센터와, 앱 알림벳지를 확인한다.
참고 자료
- https://firebase.google.com/docs/flutter/setup?hl=ko

Leave a comment