[WildFly & Servlet] About WildFly, WildFly Installation and Servlet Application Test
About WildFly
JBoss WildFly는 자바 기반의 Java EE 스팩을 지원하는 오픈 소스 WAS(Web Application Server)이다. 기존에 JBoss AS(Application Server) 라는 이름으로 개발되었으나, JBoss EAP(유료 제품, Enterprise Application Platform)와 같은 제품들과 구별하기 위하여 WildFly라는 이름으로 변경되었다. 2006년 레드헷에서 JBoss사를 인수하여 JBoss 프로젝트들이 운영되고 있다.
WildFly 14 버전 부터 JAVA EE 8, Jakarta EE 8 스팩을 지원한다.
WildFly Installation
환경
- OS: Windows 10
- Java 설치
- 테스트 버전: OpenJDK 11.0.9.1
- Maven 설치
- 테스트 버전: Maven 3.6.3
Install WildFly
Requirements: Java SE 8버전 또는 최신 버전 필요
- WildFly 사이트 Download 페이지 에서 설치용 zip 파일을 다운받아 준다.
- 테스트 버전: wildfly-22.0.1.Final
- 원하는 경로에 압축을 해제한다.
WildFly Directories
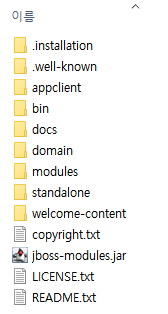
WildFly 설치 후 아래와 같은 Directory들을 확인 할 수 있다.

각 Directory들은 다음과 같은 목적을 가진다.
- appclient: Application client container가 사용하는 각종 설정 파일들, deployment content, 쓰기 영역 목적
- bin: 기동 script와 설정파일들이 저장되고, add-user 와 같은 command line 유틸들이 저장되어 있다.
- bin/client: maven 기반이 아닌 client의 사용 목적
- docs/schema: XML schema definition 파일들이 저장
- docs/examples/configs: 특정 use case들에 대한 configuration 예제들이 저장
- domain: Domain mode process들이 사용하는 각종 설정 파일들, deployment content, 쓰기 영역 목적
- modules: server에서 사용되는 다양한 module들이 저장
- standalone: standalone 서버로 실행 시 사용되는 각종 설정 파일들, deployment content, 쓰기 영역 목적
- configuration: standalone server 설정파일이 저장
- data: server가 restart를 대비하여 persistent 정보 저장
- deployments: deployment 정보 저장. auto-detection 가능
- lib/ext: application들이 사용하는 설치된 jar들 저장
- log: standalone server log file 저장
- tmp: standalone server temp file 저장
- tem/auth: local client들과의 auth token 교환을 목적으로 사용
- welcome-content: 기본 welcome 페이지 content
Run Wildfly with standalone mode
- Standalone Mode: WildFly Server 각각이 독립적인 서버로서 동작
- Domain Mode: Domain Controller 서버가 도메인 전체 서버들을 관리
터미널을 이용해 WildFly 디렉토리에서 아래의 명령을 통해 standalone mode로 WildFly를 실행해 준다.
# For Linux
$ WILDFLY_HOME/bin/standalone.sh

# For Windows
$ WILDFLY_HOME\bin\standalone.bat
아래와 같이 wildfly가 기동된다.

관리 페이지
관리 페이지에 접속하여 UI를 통해 wildfly를 설정할 수 있다.
- 기본 관리 페이지 : http://127.0.0.1:9990/management
- Admin console : http:/127.0.0.1:99990

Create User
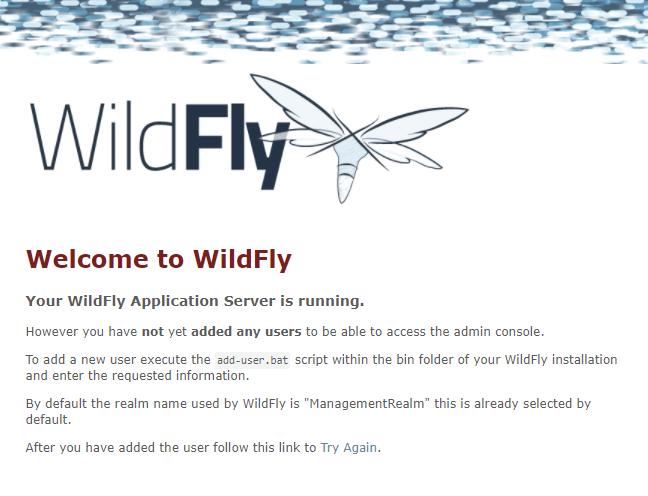
최초 관리 페이지 접속 시 User가 등록되어 있지 않다. shell을 사용해 관리자용 혹은 application 용 User를 생성한다. 이후 관리 페이지에서 생성된 User 정보로 로그인이 가능하다.
- 아래 경로의 스크립트를 실행
# For Linux
$ WILDFLY_HOME/bin/add-user.sh

# For Windows
$ WILDFLY_HOME\bin\add-user.bat

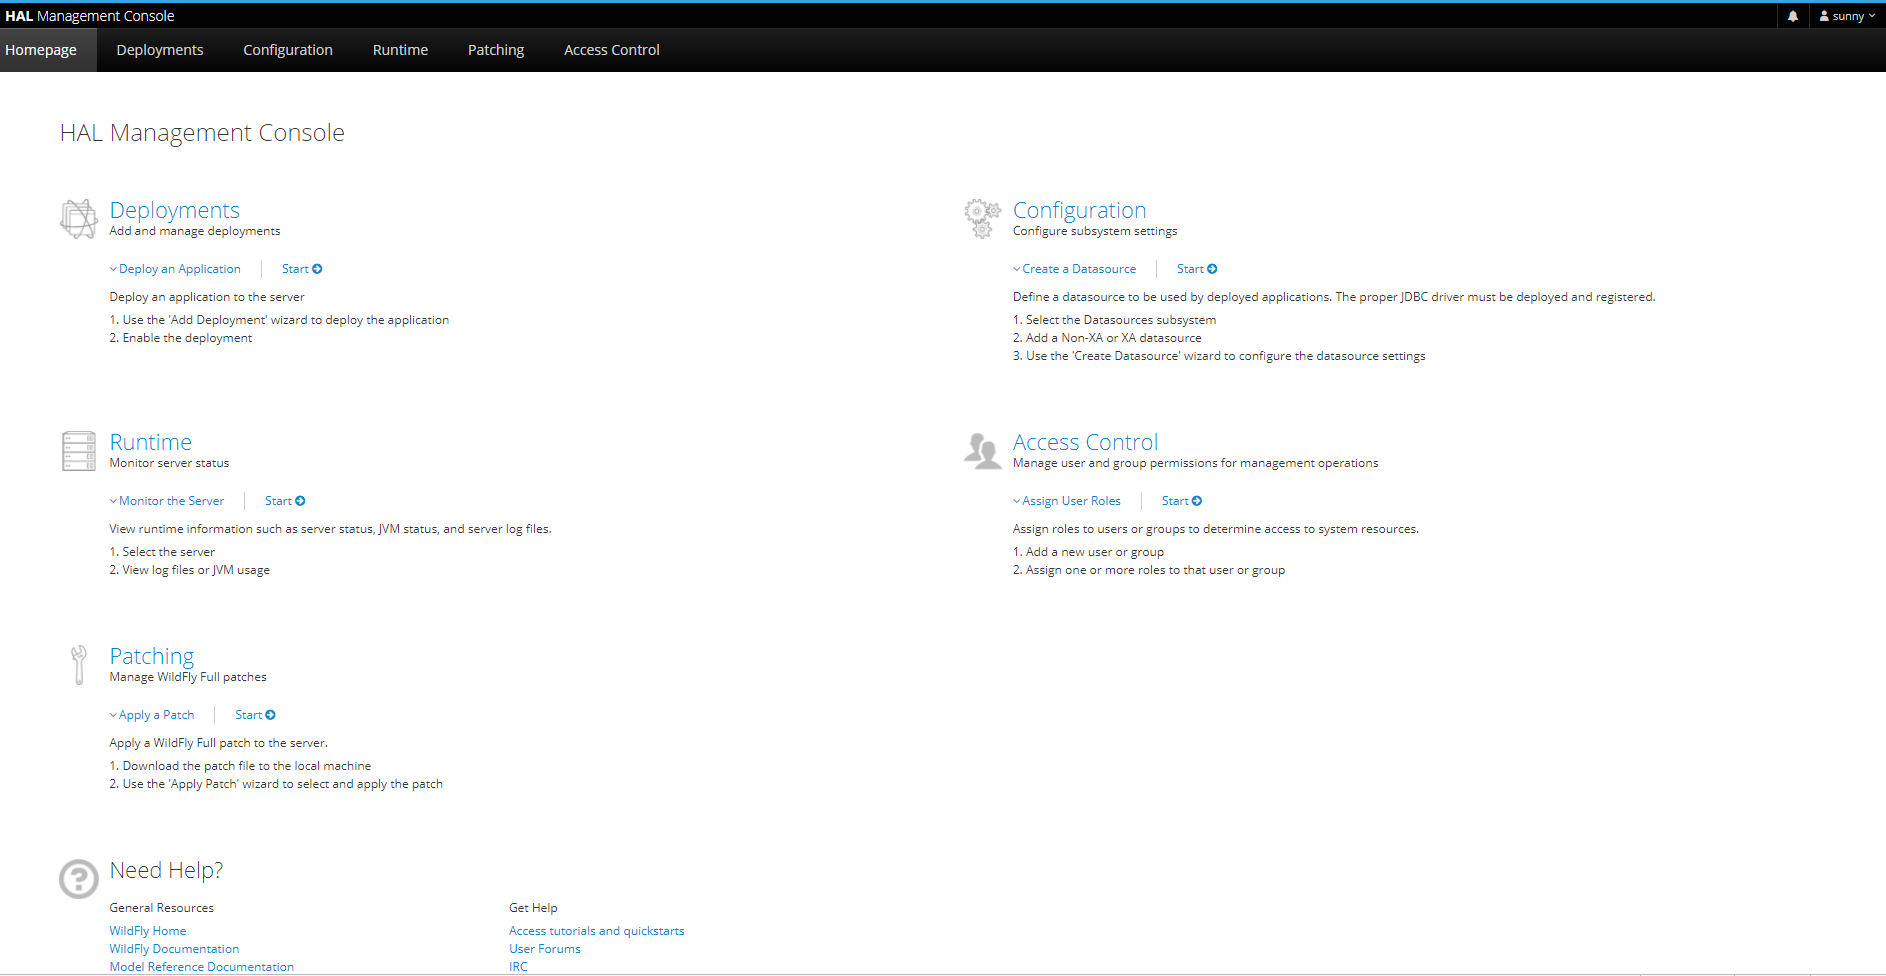
- 생성된 User 정보로 Management Console에 로그인한 UI

Servlet Application Test
wildfly에서 제공하는 예제를 참고하여 Servlet Application을 작성한다.
예제 Service
package org.taesunny.echo;

public class EchoService {
    String createEchoMessage(String message) {
        return "You say " + message + "I say " + message;
    }
}
예제 Servlet
- @WebServlet annotaion을 통해 URL Pattern을 등록 할 수 있다.
- @Inject annotation을 통해 앞에서 작성한 Service Class를 Injection 받을 수 있다. (아래의 CDI Bean 내용 참고)
package org.taesunny.echo;

import java.io.IOException;
import java.io.PrintWriter;

import javax.inject.Inject;
import javax.servlet.annotation.WebServlet;
import javax.servlet.ServletException;
import javax.servlet.http.HttpServlet;
import javax.servlet.http.HttpServletRequest;
import javax.servlet.http.HttpServletResponse;

@SuppressWarnings("serial")
@WebServlet("/EchoMic")
public class EchoServlet extends HttpServlet {

    static String PAGE_HEADER = "<html><head><title>helloworld</title></head><body>";

    static String PAGE_FOOTER = "</body></html>";

    @Inject
    EchoService echoService;

    @Override
    protected void doGet(HttpServletRequest req, HttpServletResponse resp) throws ServletException, IOException {
        resp.setContentType("text/html");
        PrintWriter writer = resp.getWriter();
        writer.println(PAGE_HEADER);
        writer.println("<h1>" + echoService.createEchoMessage(req.getParameter("message") + "<h1>"));
        writer.println(PAGE_FOOTER);
        writer.close();
    }
}
CDI Bean
JavaEE 6의 CDI(Contexts and Dependency Injection) Bean 스팩 덕분에 Spring과 같이 DI가 가능하다. 아래와 같이 beans.xml 파일에 CDI Annotation을 scan하도록 설정할 수 있다.
- beans.xml 예제 (~/WEB-INF/beans.xml)
WEB-INF - Web Information의 약자, 웹 어플리케이션을 실행하는데 필요한 클래스 파일이나 설정 파일 등을 저장 (출처)
아래와 같이 bean 설정에 ‘bean-discovery-mode=”all”’ 옵션을 추가하면 모든 class들을 scan 하여 가능한 경우 bean으로 등록해 주고, ‘bean-discovery-mode=”annotated”’ 혹은 설정하지 않을 경우 annotation을 설정한 경우만 bean으로 등록해 준다.
  <beans xmlns="http://xmlns.jcp.org/xml/ns/javaee"
     xmlns:xsi="http://www.w3.org/2001/XMLSchema-instance"
     xsi:schemaLocation="
        http://xmlns.jcp.org/xml/ns/javaee
        http://xmlns.jcp.org/xml/ns/javaee/beans_1_1.xsd" bean-discovery-mode="all">
  </beans>
Build And Deploy Project
pom.xml
wildfly-maven-plugin를 사용해 WildFly에 쉽게 deploy, redeploy, undeploy할 수 있다. 기본 설정을 통해 deploy 할 경우 자동으로 WildFly를 찾아 deploy할 수 있고, Configuration을 추가로 설정할 수 있다.
-
기본 설정
... 생략 <build> <!-- Set the name of the WAR, used as the context root when the app is deployed --> <finalName>${project.artifactId}</finalName> <plugins> ... 생략 <!-- WildFly plug-in to deploy the WAR --> <plugin> <groupId>org.wildfly.plugins</groupId> <artifactId>wildfly-maven-plugin</artifactId> <version>${version.wildfly.maven.plugin}</version> </plugin> </plugins> </build> ... 생략 -
Configuration 추가 설정
deploy configuration 문서, undeploy configuration 문서, redeploy configuration 문서를 참고하여 원하는 configuration들을 설정할 수 있다.
- 예제
  ...
  <build>
          <!-- Set the name of the WAR, used as the context root when the app
              is deployed -->
          <finalName>${project.artifactId}</finalName>
          <plugins>
  						...
              <!-- WildFly plug-in to deploy the WAR -->
              <plugin>
                  <groupId>org.wildfly.plugins</groupId>
                  <artifactId>wildfly-maven-plugin</artifactId>
                  <version>${version.wildfly.maven.plugin}</version>
                  <configuration>
                      <hostname>{deploymnet를 실행할 target server}</hostname>
                      <port>{listening 중인 port}</port>
                      <name>{deploy할 대상 (war)}</name>
                  </configuration>
              </plugin>
          </plugins>
      </build>
  ...
Deployment
아래의 maven 명령을 통해 빌드 후 WildFly 에 deploy할 수 있다.
mvn clean install wildfly:deploy

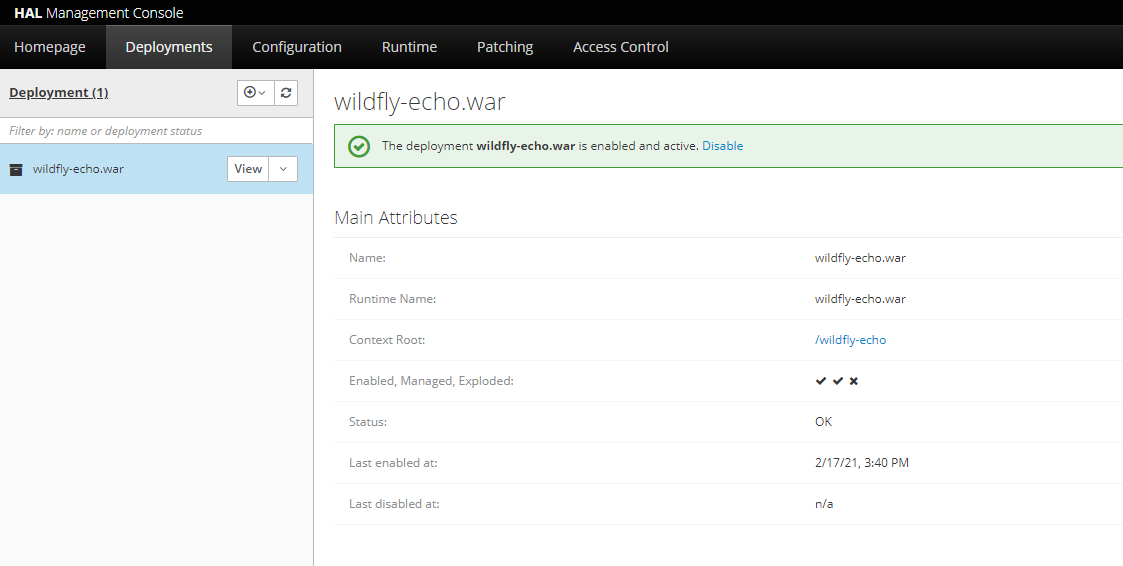
deploy가 성공하면 WildFly의 Management UI에서 deploy된 Application을 확인 할 수 있다. pom.xml 파일의 artifactId로 context가 설정되어 이후 API 호출 시 사용된다.

Application API Test
pom.xml 파일의 artifactId로 context가 생성 되어 등록한 context 이름과 servlet의 URL로 API 호출이 가능하다.
- IP, Port 수정 방법: ~{WildFly Dir}\standalone\configuration의 standalone.xml 파일을 수정하여 기본 Listening IP, Port를 수정할 수 있다. [참고 문서]
-
HTTP Request Example
// example HTTP GET Request http://127.0.0.1:8080/wildfly-echo/EchoMic?message=imyourfather](http://127.0.0.1:8080/wildfly-echo/EchoMic?message=imyourfather - HTTP Response Example

Undeploy Application
maven 을 통해 application을 undeploy 할 수 있다.
$ mvn wildfly:undeploy

Leave a comment